Tilt-shift camera lens effort using Photoshop


2. Take a copy of the background’s layer, moving the layer on the icon Create New Layer on the lowest part of the Layers Palette. Change the new layer named Blur.
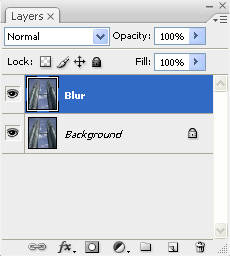
3. Blur layer must be active. Click on the option - Filter>Blur>Gaussian Blur. We have to choose 3 px for Blur Radius value. Then press OK. The layer will completely blur out.

4. Click on Add Layer Mask icon on the below of Layers’ palette. Now we get a white mask square near the layer’s pictogram.

5. Then select the Gradient Tool from the toolbox or shortcut (G) button. Make sure that the colors of the foreground and of the background are black and white (D) button. Make a click then on Radial Gradient on the tool’s options bar.

6. The Gradient tool will create a very smooth transition between the foreground’s color and the background’s one.

7. Switch over the Blur layer mask, making a click on its pictogram on the Layer’s palette. Otherwise we’ll fill the picture with black-and-white gradient.
8. The gradient may be reapplied so many times on the picture as your wish. It is Easy & quick trick.
final Image :

Share This:
Siva
I'm Siva. A full time Graphic and web designer. I enjoy to make modern designs. I love to create Creative designs and write about design, computer, Internet, Mobile and Facebook with this blog.


No Comment to " Tilt-shift camera lens effort using Photoshop "